|
Designing Your Own Paper Bridge Lessons
In designing your paper bridge lesson plan, your probably
won't get very far without doing the activity
yourself. Just as students need to become familiar
with the materials they are designing with or the product
they are redesigning, you'll need hands-on experience
with the paper bridge task. The Challenges
In Physical Science textbook provides a pre- and
post-test for students. These paper-and-pencil tests
can help you in assessment, and can help students by
getting them to recall similar structures like fences
and full-scale bridge. A Formative
Assessment task you might ask your students to do
mid-unit is to predict which of the model bridges (see
below) will fail first, and then explain why. Watch
MOVIE 1 to hear about materials and teaching tips you
will need to do this activity.
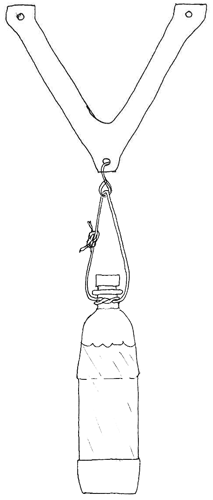
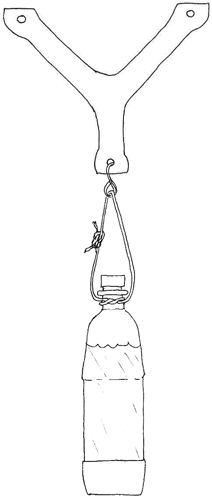
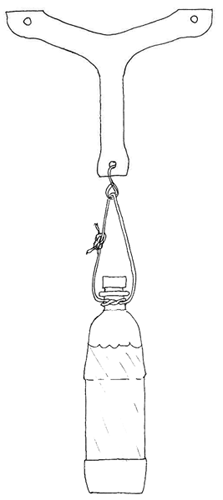
Most successful bridge designers focus on changing
two variables — the height of the paper bridge,
and the location of the hanging bottle(s). These choices
determine the angle or slope of the bridge, which affects
how much tension the bridge's diagonal arms must support.
More tensile forces means the bridge will need more
material to avoid failing. Students may prefer bridges
with short arms, but they must be made so thick that
the overall bridge is much heavier than a longer, much
more slender-armed bridge. In sum,
successful model bridge designs have diagonals that
are as nearly vertical as possible.
Deep V-shaped bridges can be made with the thinnest
arms. With this in mind, students need then to focus
on where the paper should be reinforced.
Have them look for places where the paper has more stress
lines or where it is about to or did fail. Such areas
should be reinforced by making them thicker and/or wider.
|